A good link to read about: https://blog-bertrand-thomas.devpro.fr/2019/10/24/api-authentication-with-asp-net-core-3-0-and-firebase/#comments
Create your own Identity STS(Security Token Service)

Howdy,
Long back this time :), Before few days I came across the problem where Securing of an application which contains ASP.NET web API, MVC app and mobile app was needed. And found some thing which is not very recent but worth sharing.
But primary requirement was we want to use OAuth 2.0 with ADFS 2016(which is not yet released). So Some intermediate solution is needed so that with the release of ADFS it does not take much to change.
We can have few approaches for that, But easiest seems to use some other STS which works like ADFS and does not need much change while migrating. Two approaches for that,
1) Use Azure AD(which needs AD users on Azure and was not recommended by security team)
2) Create STS using Thinktecture Identity server.
So let’s see how to create your own Security Token Service using Thinktecture Identity server.
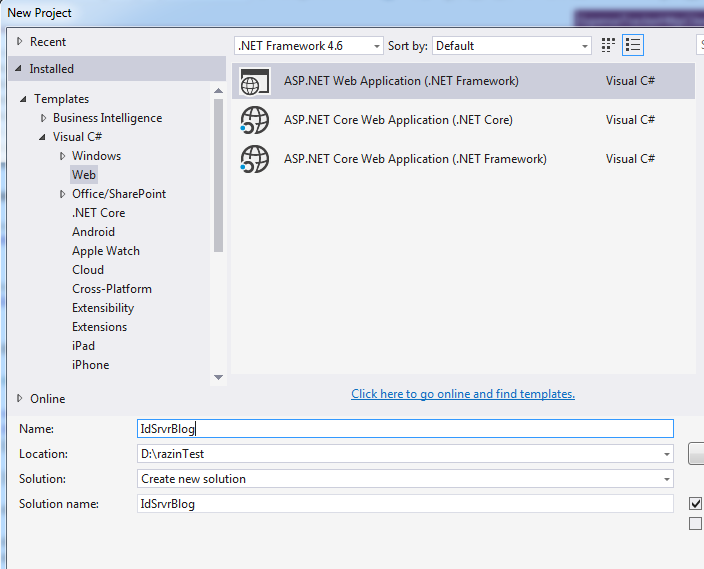
Let’s make that server as API. So create an API project in Visual Studio.

Now add the following Nuget packages.
install-package Microsoft.Owin.Host.Systemweb
install-package IdentityServer3
First one is to add OWIN middleware and select host as systemweb(IIS).
Second one is Identity server from Thinktecture.
Now create a startup class
using Microsoft.Owin;
using Owin;

[assembly: OwinStartup(typeof(IdSrvrBlog.App_Start.Startup))]
namespace IdSrvrBlog.App_Start
{
    public class Startup
    {
        public void Configuration(IAppBuilder app)
        {
        }
    }
}
I hope readers have basic understanding of OWIN can understand the empty Startup class given above(Please comment if not).
Now we need to inject one module in middleware so that it can be executed when some predefined URL is hit. That module will be responsible for Authorization. Let’s decide the sub url is baseurl/Identity.
then configuration method will be
public void Configuration(IAppBuilder app)
        {
            app.Map("/identity", idsrvApp =>
            {
                // This code will be executed when some one will hit
                // https://YourDomain/Identity
            });
        }
This is the point where you have to add the code to authorize using Thinktecture IdentityServer. Identity server will add extension method to use itself by name UseIdentityServer and it needs IdentityServerOptions as an argument.
IdentityServerOptions defines who will be defined things like Users(App users), Clients(Other calling application or browser in case of angular),Scopes(What a user or client can access), Site Name, Issue URI, SigningCertificate, AuthenticationOptions where you can add third party providers like Facebook and so on. IdentityServerOptions is the beyond the limit of single blog as here we decide that we want Windows Authentication, SQL server or Some other. In our example I will stick to InMemory user, the example they have given on their site.
Let’s modify the code, I will give explanation of each line in comment it self, and hence I will have all code in line which can be in separate files.
public class Startup
    {
        public void Configuration(IAppBuilder app)
        {
            app.Map("/identity", idsrvApp =>
            {
                // This code will be executed when some one will hit
                // https://YourDomain/Identity
                idsrvApp.UseIdentityServer(new IdentityServerOptions
                {
                    // Name of site
                    SiteName = "Embedded IdentityServer",

                    // Signing certificate
                    SigningCertificate = LoadCertificate(),

                    // Factory to get user, clients Token services and scopes etc
                    Factory = new IdentityServerServiceFactory()
                                .UseInMemoryUsers(GetUsers())
                                .UseInMemoryClients(GetClients())
                                .UseInMemoryScopes(StandardScopes.All)
                });
            });
        }

// We are using In memory users and this will return list of users
        static List<InMemoryUser> GetUsers()
        {
            return new List<InMemoryUser>
            {
                new InMemoryUser
                {
                    Username = "bob",
                    Password = "secret",
                    Subject = "1",

                    Claims = new[]
                    {
                        new Claim(Constants.ClaimTypes.GivenName, "Bob"),
                        new Claim(Constants.ClaimTypes.FamilyName, "Smith")
                    }
                }
            };
        }
// We are using In memory users and this will return list of clients(applications)
        static IEnumerable<Client> GetClients()
        {
            return new[]
            {
                new Client
                {
                    Enabled = true,
                    ClientName = "MVC Client",
                    ClientId = "mvc",
                    Flow = Flows.Implicit,

                    RedirectUris = new List<string>
                    {
                        "https://localhost:44319/"
                    },

                    AllowAccessToAllScopes = true
                }
            };
        }

        X509Certificate2 LoadCertificate()
        {
            return new X509Certificate2(
                string.Format(@"{0}\bin\identityServer\idsrv3test.pfx", AppDomain.CurrentDomain.BaseDirectory),
                "idsrv3test");
        }
    }
We have our Identity server ready 🙂
I think creation of client is Pretty simple, I will write another post for that.
Reference : http://identityserver.github.io/Documentation/docsv2/overview/mvcGettingStarted.html
Please comment if you need further information.
